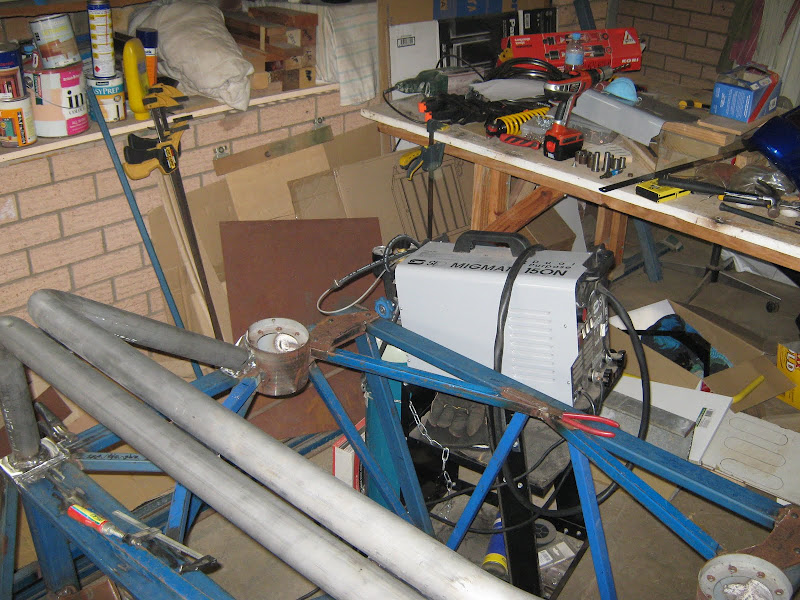
Anyone just reading my blog updates would assume I'd given up on the car or something. Not so - I've just got more into the habit of posting updates on the various car forums I frequent and not here. I need to remind myself to update the blog too whenever I post an update elsewhere.
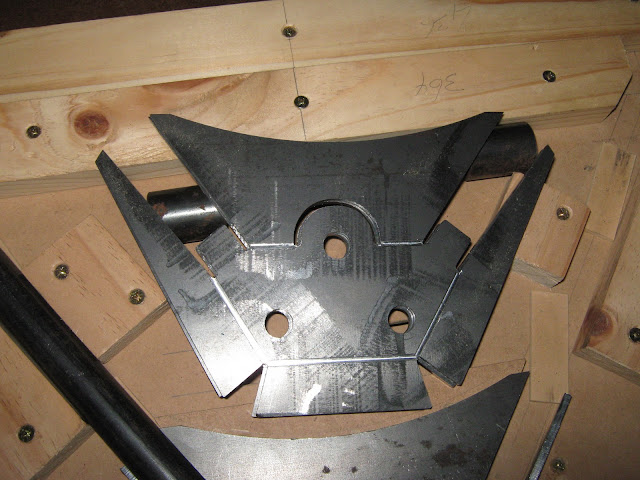
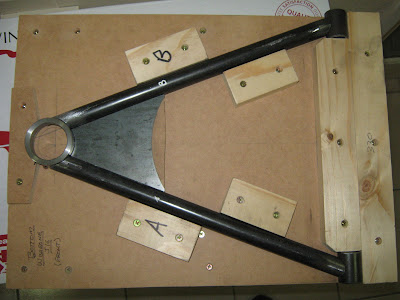
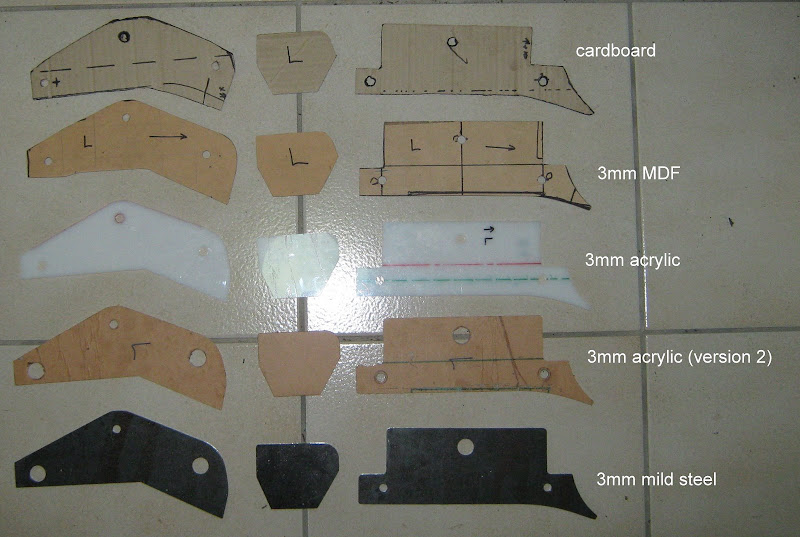
April 2011 - After several iterations, got to a final design for the rear wishbone balljoint plates. Here they are CNC cut with slight grooves to assist vise bending; and one folded and bolted into the wishbone jig.
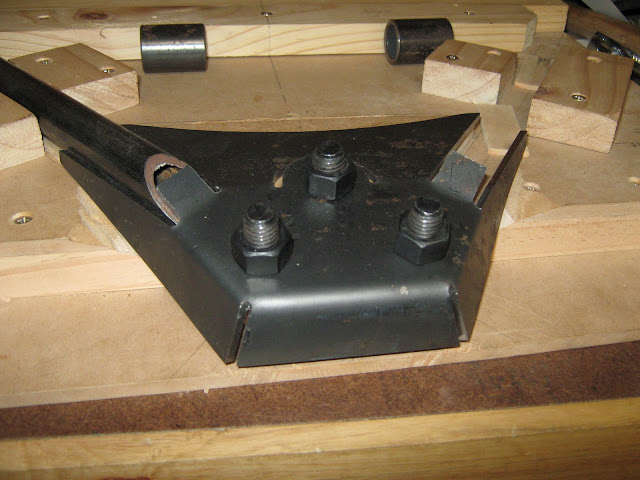
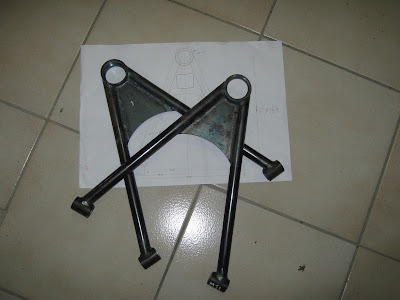
Final product all TIG welded then painted; showing the underside of the folded part; and with the ball joint mounted.
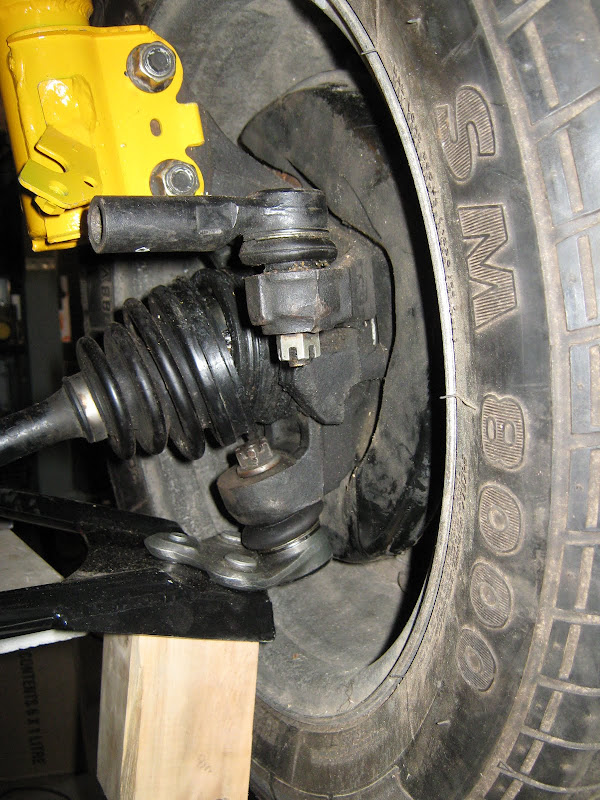
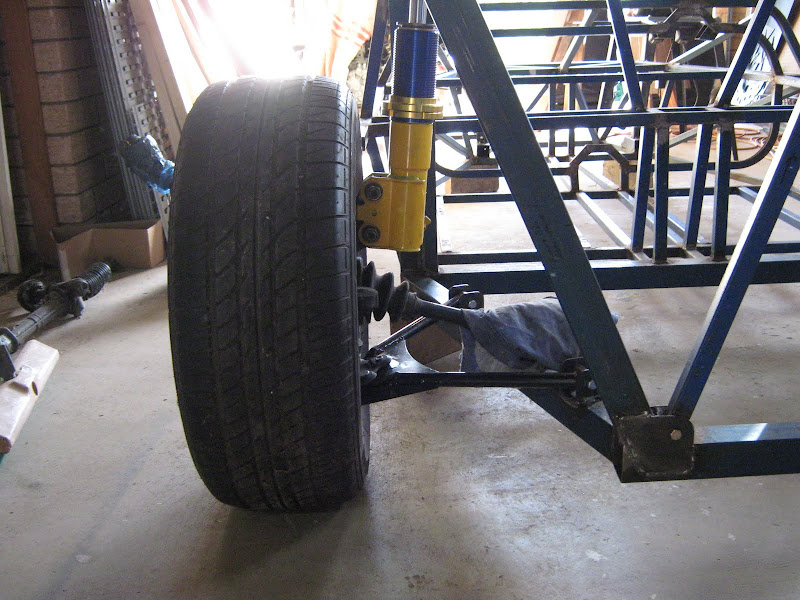
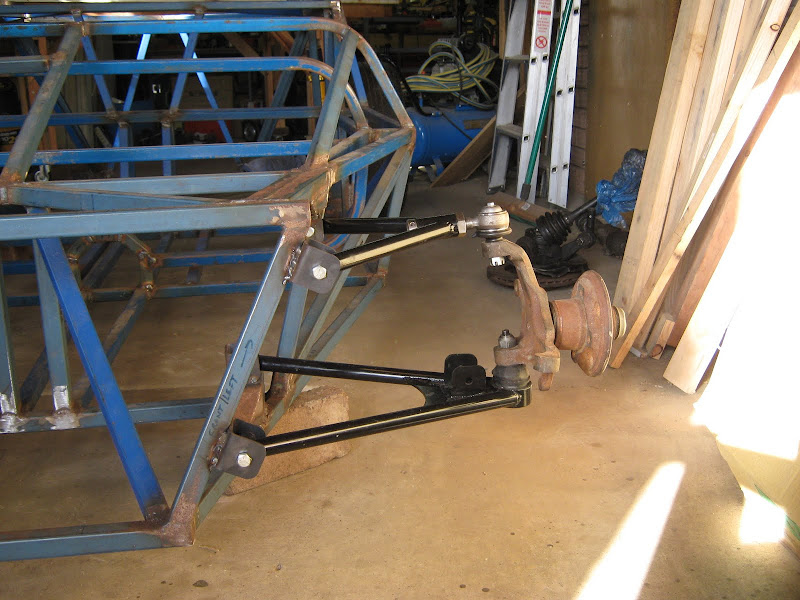
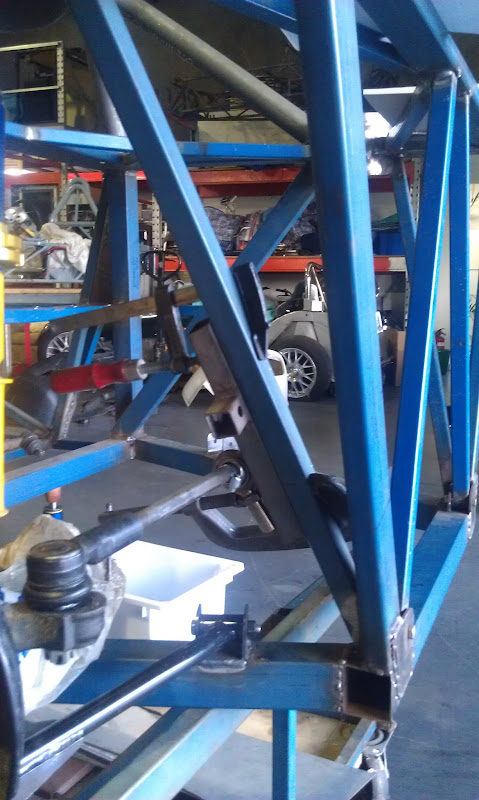
Bolted together one whole set of rear suspension with the wishbone brackets clamped on the chassis to check. Very pleased to measure static camber at about 1 degree negative, with some range in the strut adjustment to go further. That's what all of the design work said it should be but reality has a way of proving me wrong sometimes. Pic of the whole assembly below, plus another showing the inclined entry angle in the Corolla upright, explaining the "odd" angle of the ball joint and wishbone.
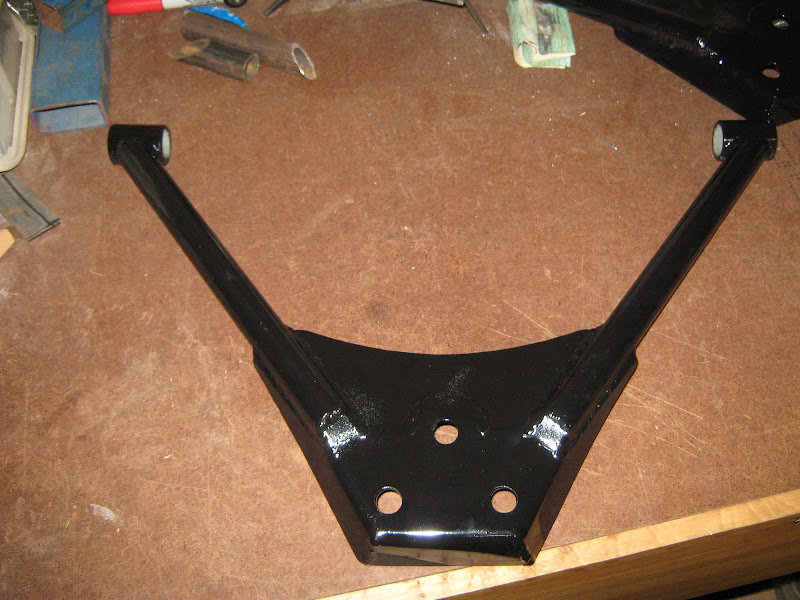
Got some encouragement/assistance from a friend. End result - rear suspension brackets aligned and fully welded.
Plus, he helped me flip the chassis over so I could finish some of the underside welds. After they were done, I flipped it back and dragged it off the build table and stuck some front suspension on too.
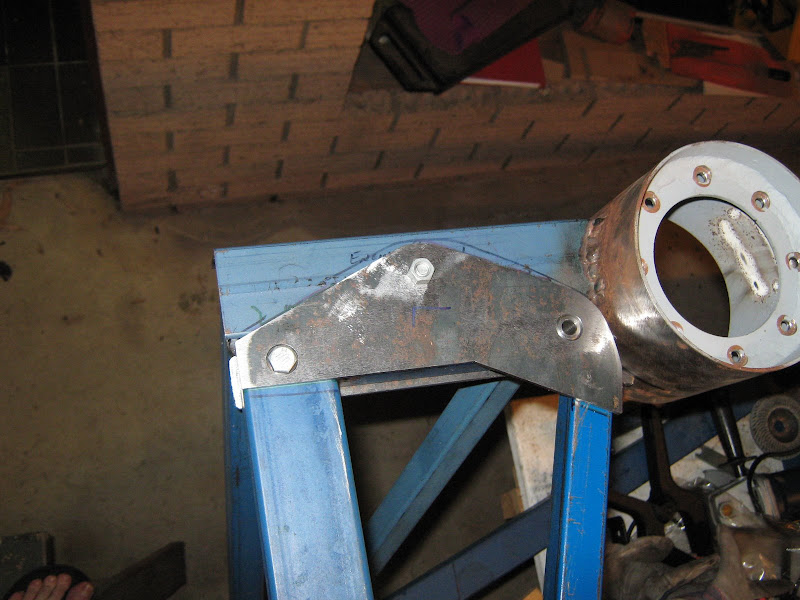
Don't look too closely at the welding on those brackets. Need grinding out and redoing with the chassis at a more workable angle
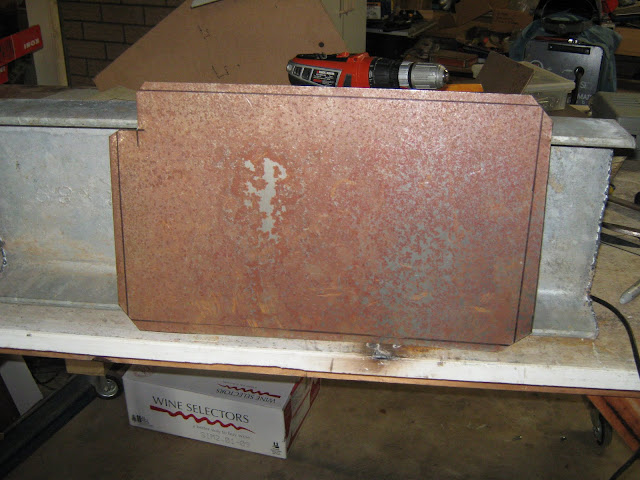
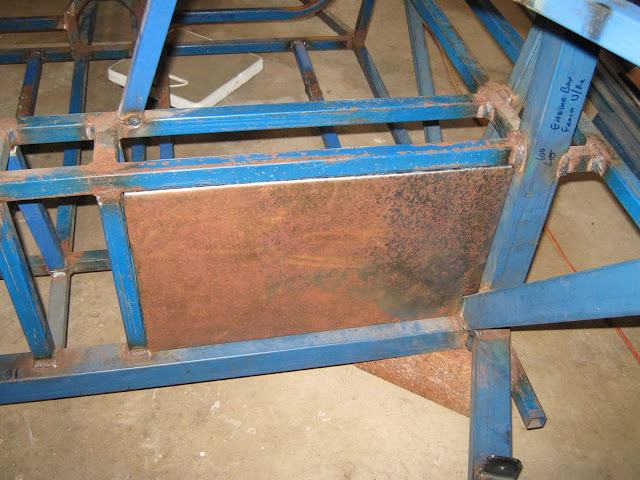
Another friend came around to nudge me forward, with the end result being that we cut, folded, and fitted two of the three fixed firewall panels. Not welded yet. Made from 1mm steel, with a 10mm lip folded round the edge to make welding easier. Would be fair to say the second one was easier and a better result than the first.
Also played another round of "Stop Dominic over-analysing solutions to non-existent problems" which means that something I'd been fussing about possible solutions to for 12+ months was solved today by simply not doing it! Was quite liberating once I got used to the idea.
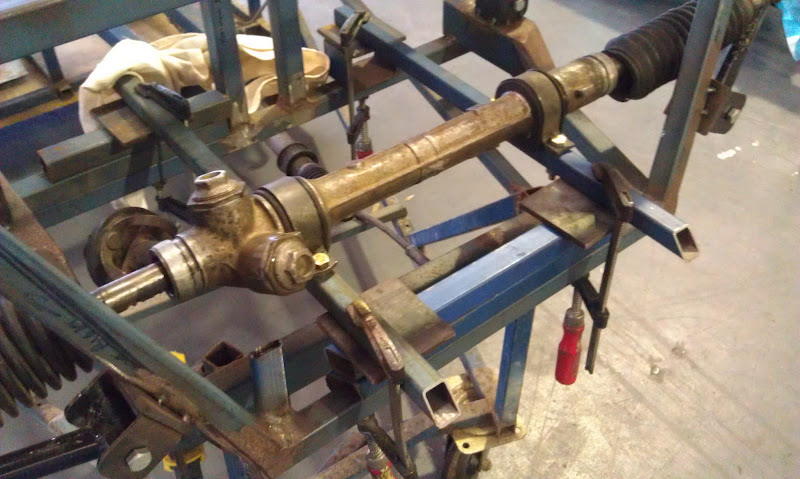
August 2011 - Time for a small update. Unfortunately, discovered that (due to a measurement error) my bottom wishbone brackets are in the wrong place. As a result, with the camber adjusters wound in as far as they'll go, I can get no more than 0 camber. I've been fiddling with other things while stewing on this. In the end, got another set of brackets (thanks Paul) and set to work.
Out with the old
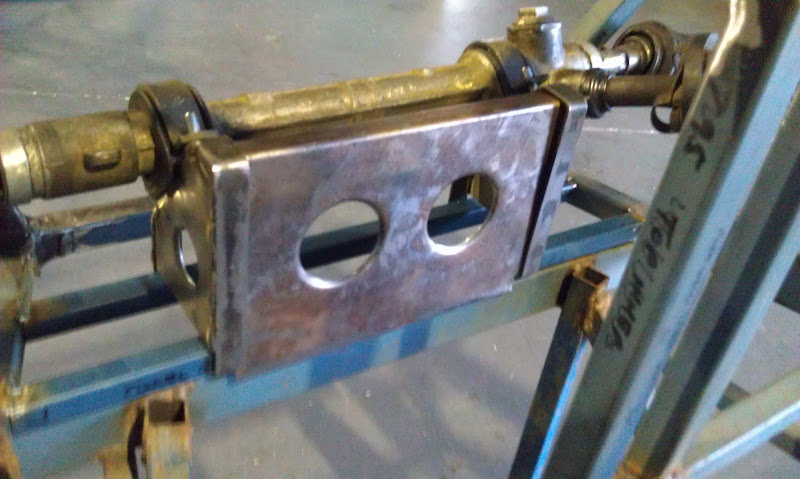
Work out what size packer it needs
Suspension jig actually lines up properly now (shouldn't have ignored the mismatch originally).
With end result I can bolt together the rest of the front end. Need to finish rack mounts now.
Yet another friend came round to hurry me along and give much needed assistance/guidance on a few areas. Result? Primary roll hoop trimmed to size, base plates made and welded, and roll bar fully welded. Also visible in this photo, the perforated hoop around the dash/scuttle bulkhead is now all welded.
There's a second bar to sit parallel to the main hoop and form the back braces. Here it's sitting not quite fully trimmed and mounted. It's actually been bent slightly too narrow (probably the fault of my drawings to the supplier) so Paul took it with him to stretch open a bit (with a porta-power). Only needed to move by 10mm or so. Angled base plates for the rear hoop are made and fully welded in, ready for the bar itself.
December 2011 - In the pursuit of more progress, the Gecko has taken up temporary residence in a friend's workshop, where I'll work on it but with access to better tools and (much) better expertise than at home. Plan is: knock off work at 3:30 every Tuesday and do 4-odd hours plus other nights and some weekend time as available (and as suits the proprietor).
January 2012 - Have had a couple of bursts of productivity over the last few weeks.
Mocked up the position of the inner toe-link mounts at the rear. Used the engine hoist to run the suspension up and down through full travel while checking bump steer. Waiting on some LH female rod ends to arrive now. Will add some pics of the final bracket and adjuster once they're done.
Today was rack positioning. After some faffing about, took the 9" grinder to a pair of diagonal tubes that were in the way. Made things much easier after that. Stuck some temporary rails under the rack and fiddled with various packing pieces until the right position was established. With a small laser pointer strapped to the stub axle (pointing out to the side) total bump steer (all toe-in) was 5mm measured at 3.6m away. That'll do alright. Next step is to mount the column again and find the correct rack angle, then make permanent mounts.
February 2012 - Nnocked out these two rack brackets, which will perch on some light transverse tubes and get a transverse stiffening brace across the back as well. Looks like Gemini and Escort racks share basically identical mounting dimensions so quick-rack upgrades should be a doddle.
Cleaned up the remains of the cut-off diagonal tubes, fitted the two 20mm cross rails, and made a stiffening web to tie the two rack brackets together. Dry fitted for now, will post another shot without the rack once it's all welded up.
Finished welding up the rack mount in the bench and spent a fair bit of time getting it properly positioned in the chassis before welding it in. Some finish welding to do once the chasis is flipped into a more accessible position. End result is stiff and light.
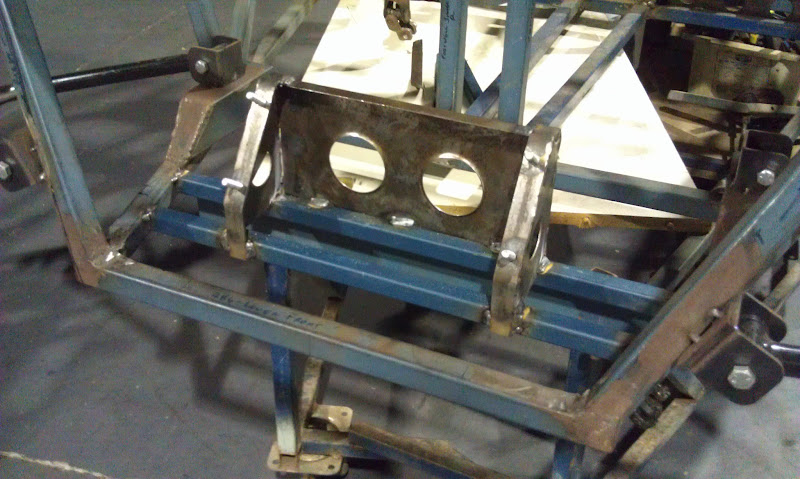
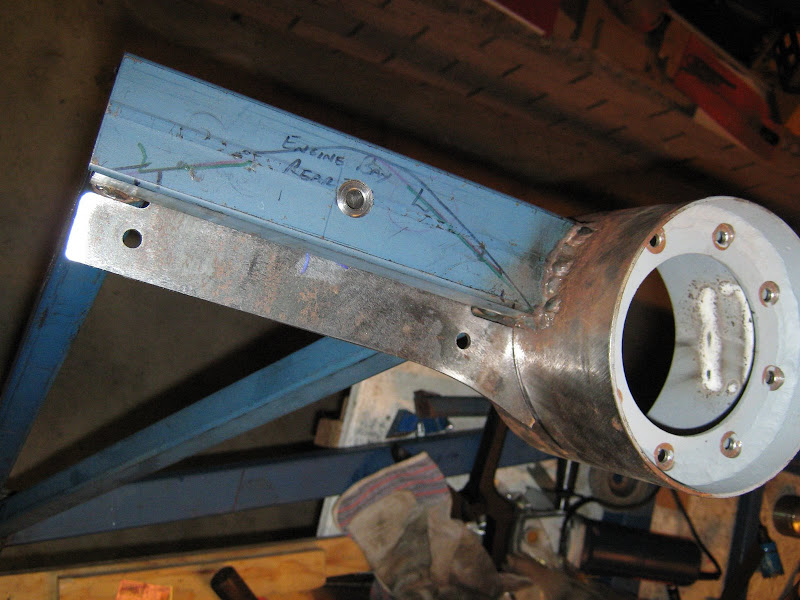
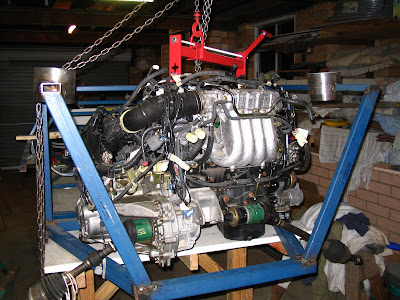
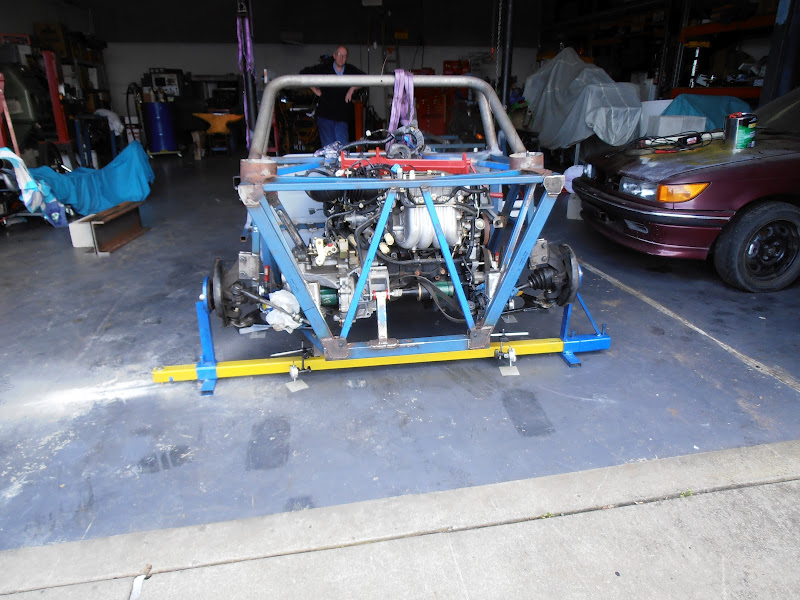
March 2012 - Slow progress because the semester has started and work pressures ramped up accordingly. Still, have managed to twiddle around with engine mounts and got to this point....
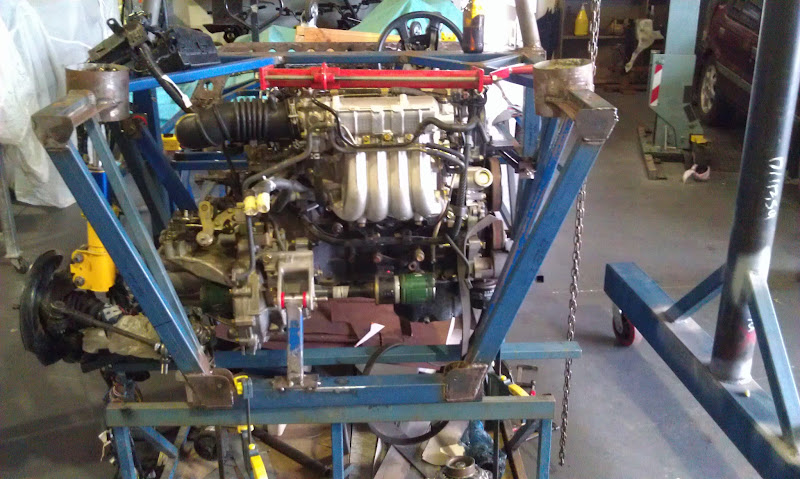
That's it sitting/hanging on the four tacked in mounts. Everything was put together with the drivetrain centred (i.e. equal length driveshafts). Now that it's in, it's readily apparent that it can/should go left quite a bit. So, this weekend I'll pull the engine, knock off the tacked mounts and shift everything left a few inches. Will make for a much happier level of access around the accessory end of the motor. If I don't do it, it'll just piss me off forever more
OK, knocked all the mounts off the chassis, shifted the front and rear ones to the left by ~70mm, remade the left and right mounts to suit. Done.
Made some progress towards mounting pedals tonight - nothing worth taking a pic of though.
Did do a test fit of an almost completed part (one of a pair) however that was definitely worth photographing!
And that gets us back up to date!
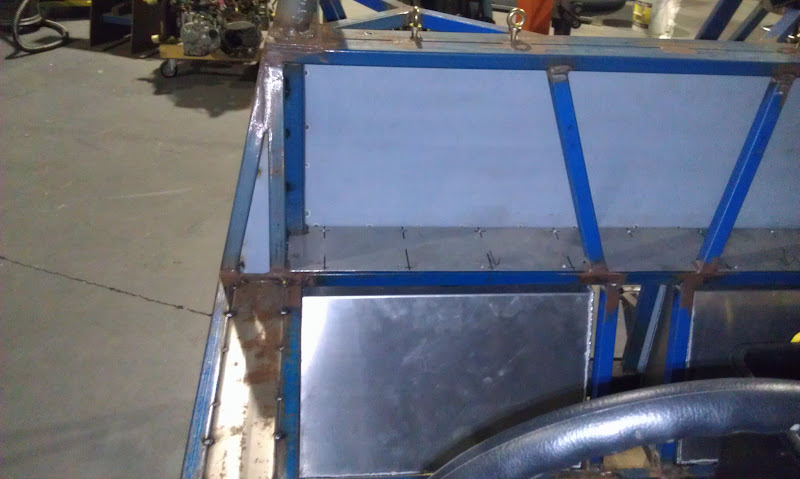
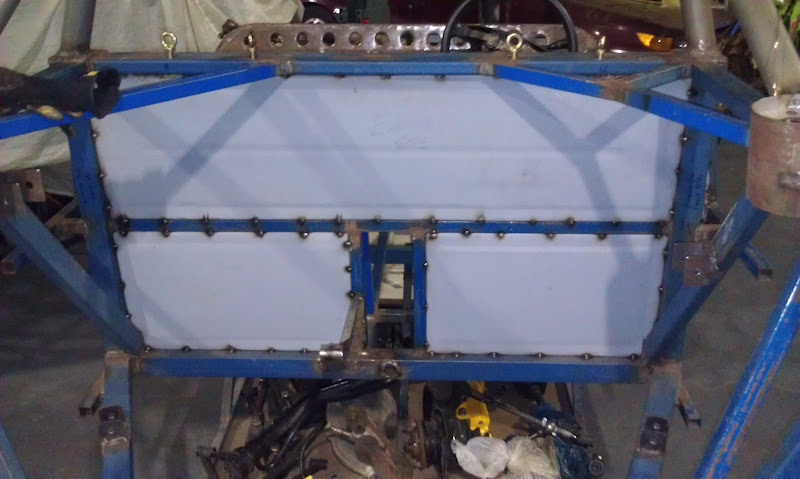 Photo from the front also shows the welded in panels in the "arm-rest" sill panels.
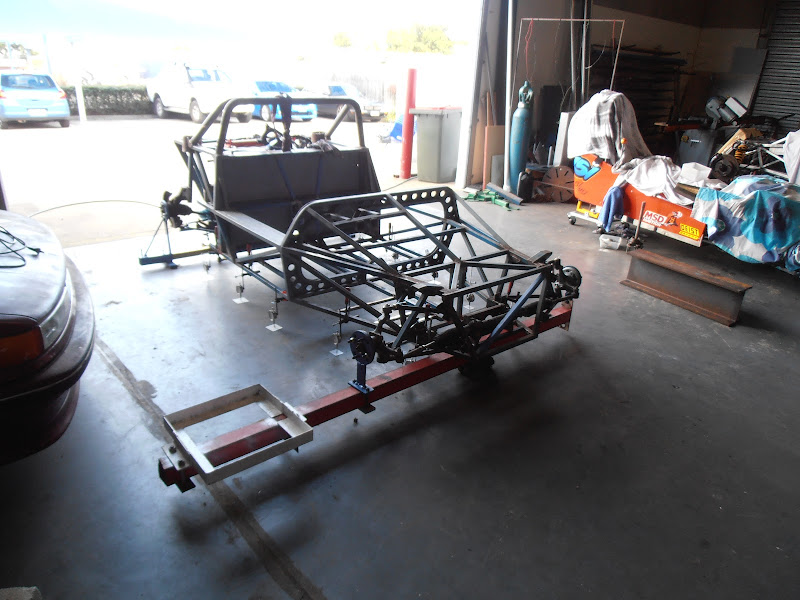
 That's all the structural parts of the chassis complete, so time to find out where the B&T jig is and get twisting!
26 July 2012 - Important milestone today.
That's all the structural parts of the chassis complete, so time to find out where the B&T jig is and get twisting!
26 July 2012 - Important milestone today.
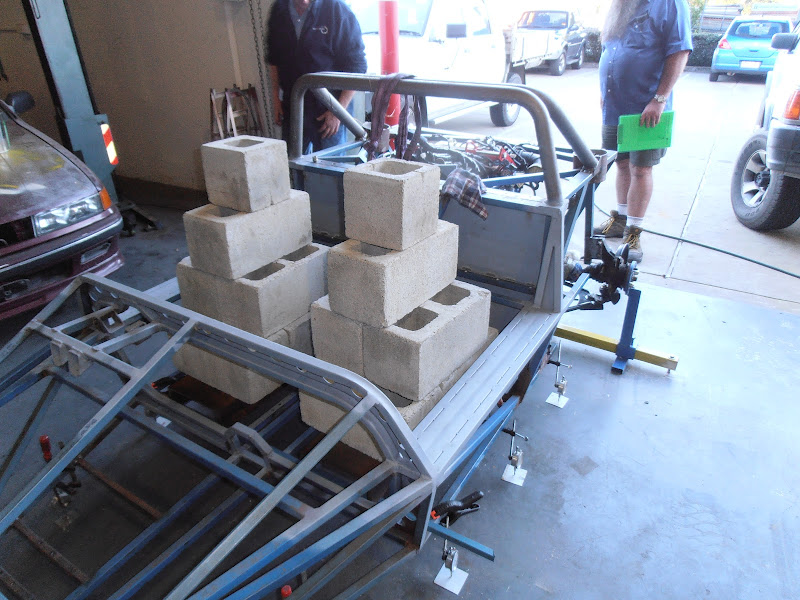
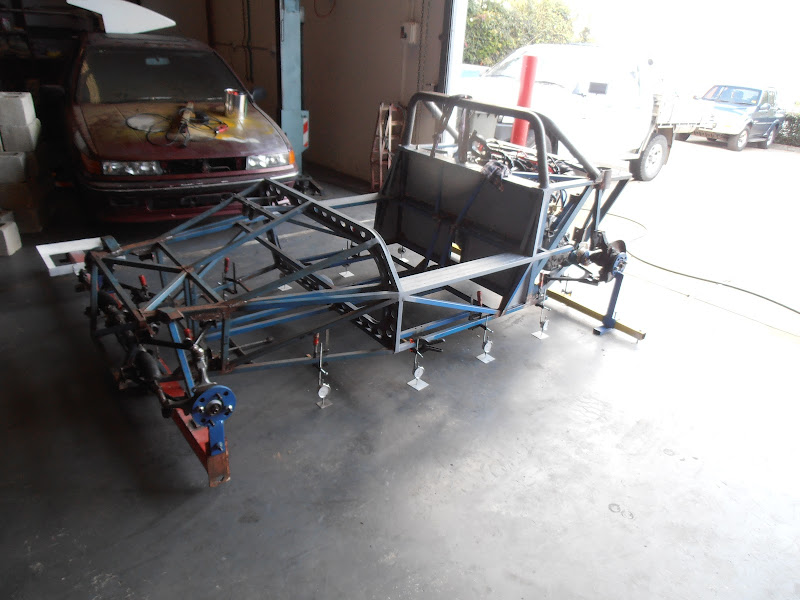
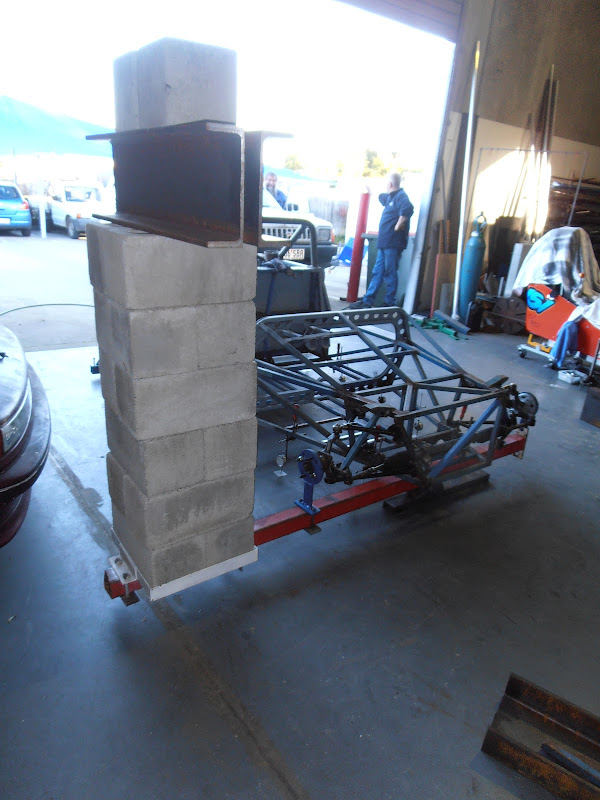
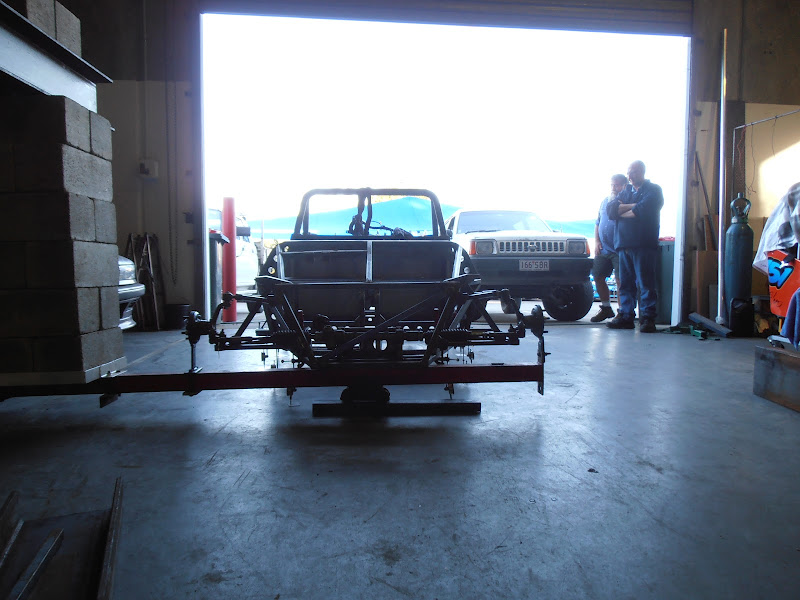 Don't have the actual report yet but, based on the trial runs Paul and I did last night, it exceeds the required 3800Nm/degree (and 1.25mm beaming) quite comfortably. That's 285kg of besser blocks and chunks of scrap steel on the hook for the torsion test - the angle (or lack) of the beam in the last pic may give you some idea of the stiffness (oooh, errr missus).
Many, many thanks to Paul Hannell for both the use of his workshop and his ongoing technical assistance and to Don Myles for his assistance today lifting besser blocks on and off (and on and off and.....).
27 July 2012 - Got a phone call from the engineer, who obviously knew I was sitting like an expectant father waiting for results. 5828 Nm/degree and 0.3mm beaming distortion. His remark? "You could put a V8 in that if you wanted!" Quite pleased at this point.
Now that I know the chassis doesn't need to change, the real work can begin.
Don't have the actual report yet but, based on the trial runs Paul and I did last night, it exceeds the required 3800Nm/degree (and 1.25mm beaming) quite comfortably. That's 285kg of besser blocks and chunks of scrap steel on the hook for the torsion test - the angle (or lack) of the beam in the last pic may give you some idea of the stiffness (oooh, errr missus).
Many, many thanks to Paul Hannell for both the use of his workshop and his ongoing technical assistance and to Don Myles for his assistance today lifting besser blocks on and off (and on and off and.....).
27 July 2012 - Got a phone call from the engineer, who obviously knew I was sitting like an expectant father waiting for results. 5828 Nm/degree and 0.3mm beaming distortion. His remark? "You could put a V8 in that if you wanted!" Quite pleased at this point.
Now that I know the chassis doesn't need to change, the real work can begin.